I've posted earlier about my mortar & pestle collection. I really do love them & love using them. They each have their own purpose, well, accept for the wooden one on the left. I can't find much use for that one other than just looking pretty. The pestle (the little stick) is too rounded on the end so it doesn't really make good contact with whatever is in the mortar. The rest of them have their own jobs so I thought I'd start showcasing each of them every once in a while. I'm not saying that I don't have, and use, my food processor, coffee grinder, etc, but I do occasionally enjoy primitively crushing stuff with stone or wood.
This week will feature my molcajete as I make chicken tacos. I don't have the exact recipe because I usually don't measure anything, but this will give you a general idea.
I start off charring some jalapenos & dried quajillo peppers in my little cast iron skillet. I just popped them on the stove in the hot skillet & kept turning them until they were nicely charred all the way around.
I know..they look very charred, but it's OK. The dried guajillo was almost too black, but it wasn't bitter. The jalapenos went into plastic wrap to steam & the quajillo went into a heat safe container with a little garlic & boiling water.
After about 30 minutes soaking in the hot water, I moved the chiles to a small container & used my new immersion blender (thanks Mom). I just added a little of the soaking water to make a nice puree. No, I wasn't going to tackle the chile with my mortar. I'm a fair weather mortarer.
Meanwhile, I was boiling a couple of chicken thighs with a a few pieces of celery & carrot. When the chicken was cooked, I removed the chicken to cool & reserved the stock to use for the rice. I shredded the chicken when it was cool enough.
I removed the skin from the jalapenos & popped them into the molcajete along with the garlic & a bit of salt & started smashing. It doesn't look like a lot of peppers, but these jalapenos were hotter than usual. I added some coriander seed to the mortar to crush them up as well.
I added a can of strained tomatoes (reserving the liquid for the rice) to the mortar & got them nice & saucy.
I used salt, arbol molido powder, oregano, cumin & chile ancho powder this for these tacos. The round things in the middle are the coriander seeds which were exiled to the mortar.
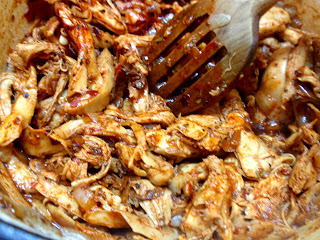
I chopped up an onion & started browning it in a pot with a little oil. When the onions softened I added the chicken, gave it a stir & added the spices.
I know, blurry picture. My kitchen is really dark so when I try to take a photo without the flash it all goes awry.
I stirred the spices to keep them from burning while I let them "blossom" in the oil. I don't let them go for long before I add the mortared tomato mixture or they'll go bitter.
While the chicken simmered....
I rinsed the rice & got that started then I broke out the masa to make the tortillas.
I mixed up the dough & let it rest for a bit before I started pressing & cooking them.
The finished product.
I didn't mention the refried beans, but maybe in another post. I accessorized the tacos with queso cojita, radishes & fresh cilantro along with a squirt of lemon. Lime would have been better, but there were no limes in sight.
This made enough for me to freeze for later. I did finish off the tortillas the next morning by way of bean tacos.
Prepping & seasoning your molcajete
Molcajetes are really great for crushing things, but they take a bit of elbow grease to get them ready to use.
I recommend buying one from a Latin grocery or somewhere similar. I know they're sometimes available at home furnishing stores, but a lot of them are for decorative purposes & man made. A true molcajete is made from volcanic rock & just like a cast iron skillet, gets better with age. The ideal thing is to get a used one, but I've never, ever seen one that's already been broken in.
So, you bring home your new molcajete, remembering to get the tejolote (pestle) which is sometimes behind the counter at the market.
Soak it in water over night. Meanwhile, look up your safety goggles & some raw rice.
The next day, hopefully a nice day so you can sit outside, grab your new molcajete, safety goggles & raw rice.
Get comfortable.
Take a hand full or two of raw rice & start grinding.
You'll soon see why I recommend that you be outside, donning safety goggles.
Rice flies out of this thing faster than you could imagine!!!
When you've finished crushing the rice, pour it out & do it again.
Do this about 5 or 10 or 20 more times until the rice is no longer a putrid shade of gray.
You may have to rinse the molcajete while crushing the rice to get rid of the rice dust & the grit.
Failure to complete the aforementioned steps could net you a mouth full of grit when you use this.
Once you've finished "ricing" the molcajete, rinse it out (no soap) using a vegetable brush or some sort of stiff brush.
Grab some garlic & cumin seeds, salt, coriander seeds & smash the heck out of them in your new molcajete.
You're almost there.
Let the paste sit over night, rise it out really well & you're ready to roll.
These are made of volcanic rock so they are heavy. I have to use both hands to pick up the molcajete I used for this recipe. I have a smaller one that I use more often but it can still be a struggle.
I hope you've enjoyed my first installment of mortar Monday.
Sorry for the really bad photos & the even worse directions, but this is how I cook. A little bit of this & a little bit of, but I'll try to do better the next time & actually include measurements.
Whew!!! This was an obnoxiously long post, huh?
Thanks for hanging in!!
xoxo
Pam


