Monday, March 28, 2011

New Art

It's been a while!!  
My computer had a little break down so I had to send her off for some "help".  She's back & in fine working condition, thanks to Mike at Triangle Tech Group.  Who knew it would be so hard to find someone to repair a computer in Durham??  I mean..RTP?  Come on!!  Well, I don't have to look any further because now I have found my place.  I was able to drop it off in Durham where Pinky (my pink computer) was swiftly picked up & taken to Raleigh. Pinky was a troubled one, so she was sent to Chapel Hill & settled in the capable hands of Mike.  He kept me informed of the progress & even replaced my anti-virus software (which let a few nasties into my computer) with the one that he uses.  I couldn't be more happy with the customer service I received.  My motherboard was even reflowed instead of replaced, saving me a bundle of money.  I have idea what that means only that it made Pinky come back to life.

During our "break" I worked on drawing faces, faces & faces.  

I wanted to branch out from my whimsy girls & my stylized girls & try my hand at more realistic, stylized faces.  I finished one of the first stylized faces I painted a couple of months ago.  I mounted her to an old piece of cabinet, then made my own texture paste to make the background more interesting.  I collaged scrapbooking paper to the background then painted over the top.  A few more embellishments & stamping & she was done.  I need to get a fixative to spray on top, but other than that, she's finished.


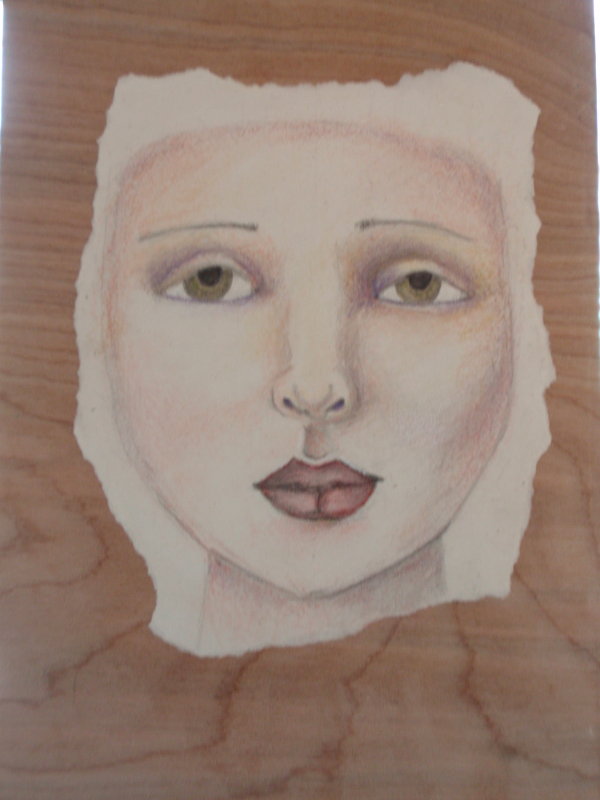
Here are several faces that I've been working on & trying to get the noses just right.  Noses are hard, then sometimes lips are hard too...then the eyes..oy.  Well, I'm relatively happy with these whole faces.  I practiced each component  individually, but the pages of just eyes, noses & lips were getting pretty creepy, so I had to put them together.


They scanned pretty lightly so it's hard to see the shading.  I did complete a mixed media piece with one of the faces.  I haven't named it yet, but it's a little gypsy mounted on wood.


I ripped the face out of my sketchbook & glued it to the wood, using my texture paste for her hair.  I cut the leaves & flower out of decorative papers & collaged them around her, then added lots of layers of paint.  I used India ink & & paint for the drippy parts, then scraped on a little gesso to soften it a bit. 


I added a few floral pebbley things on the bottom & the fabric at the bottom is a section of hem from an old pair of jeans.  I drilled 2 holes at the top to thread a piece of a tie from an old dress, then ripped an old shirt, dress & fabric scraps for the hangy thing on the left.  I'm happy with the way she turned out.


She seems to need a little something at the top, so I may add words.  I thought of burning the words into the wood, but not sure if I should do it into the paint.  I'm going to give it a try & see what happens.

I have another face shaded & glued onto another piece of wood.  


She's on the way to becoming Mary.  It'll probably take a while to get her finished because I'm still looking for inspiration.  I really am a bit addicted to drawing faces now.

Hope y'all have a great week!

Monday, March 7, 2011

Mortar Monday, Roasted Lemon Chicken


(Dakota was not diggin the butt shot.  It's been a long winter & she hasn't gotten her svelte, swimsuit body back yet.) 

This week the spotlight is on my granite mortar made in Thailand.  I picked it up at my local Asian market for under $10 & if you only want to get one mortar, I'd say this is the one to get.  It's ready to use as soon as you get it home & can be used for most everything.  That's right.  No arm achingly rice grinding or slathering it with oil, just a wash & it's ready to go.  I bought the 8" one & although it's still no sissy, I can lift it with one hand.  I think a larger one would be a little too heavy for me to easily navigate around the kitchen.  It's great for making fresh pesto, curry powder, guacamole, etc.  It's also a great way to get rid of a little tension after a rough day.

I use it to make the paste for my Lemon Roasted Chicken.  This is another one of my "no recipe" recipes, but it's recipe & can be adapted to whatever herbs you like.


For 2 chicken quarters I start out with fresh rosemary a little sprig of fresh oregano.  My oregano didn't like the winter so much so I had to add dried oregano to the mix along with a little thyme.  I popped in a couple of cloves of garlic with salt & pepper.  I also throw in a couple of teaspoons of unsalted Greek seasoning, I use Cavender's  (love, love, love).  You don't have to use Greek seasoning, but I just love Cavender's & try to use it whenever possible. It's time to smash, smash, smash.


After it's nice & smooshy I move the paste to glass bowl & add the juice & zest one one lemon.  I prefer to use 2 lemons because I love lemon, but one was all that I had.  
After I get the lemon juice mixed in with the paste, 
I whisk in a couple of glugs of olive oil & add the chicken in a glass bowl.  
I rub the marinade into the chicken & make sure that every surface of the chicken pieces have been slathered with the yummy marinade.  

I let the chicken hang out in the marinade for about an hour, but it's not necessary if you're in a hurry.  
While the chicken is soaking up the lemony goodness, I cubed some potatoes & tossed them with a little of the reserved marinade mixed with a splash of balsamic vinegar.

When I'm ready, I throw the chicken & potatoes into a baking dish & roast them in the oven at 375 degrees until the chicken is cooked through & the potatoes are tender on the inside, 
occasionally basting  the chicken & potatoes with the juices.

I transfer the chicken & potatoes to another dish & skim as much fat as possible from the juices.  
I use an enamel baking dish so I can put the dish on top of the stove & deglaze with a little white wine, lemon juice, chicken broth or water, just to loosen the browned bits on the bottom.  
I turn off the stove & add a pat of butter & stir until the butter has melted & imparted it's glossiness to the sauce.

I dish it up & spoon some of the sauce over the chicken & potatoes & I'm ready to eat.


I made rolls & a salad to go along with the rest of the meal.  
I love these rolls & they're so quick (relatively speaking) & easy to make.  
The olive oil in the marinade gives the chicken & potatoes a nice crispy 
exterior, but leaves the chicken moist & the potatoes soft on the inside. 

I usually roast everything about 30-45 minutes, but if I'm uncertain, I use a quick read thermometer to make sure the chicken has cooked through.  
The balsamic vinegar makes the potatoes look a bit dark, but I promise they aren't burned.  

This is my easy, "go to" meal that I make once every week or two.  I think it's perfect for guests, 
a date, or just a weeknight meal.  I always use chicken thighs because I like them & they cook quickly, but I've also roasted a whole chicken using the same marinade.
It's a budget friendly dish that uses ingredients that most can find in their pantry.  If lemons are crazy expensive, I sub with limes & the result is just as tasty.

Please do try this recipe & make it your own.  I've never served it to anyone who didn't like it, & trust me, my friends can be painfully honest (hugs).  I know they like the meal if they ask for the recipe
or ask me to make it again.

If you'd like the recipe for the rolls, I'll be more than happy to post it for all to enjoy.

Hope your day has been nice.


Wednesday, March 2, 2011

Bits & Baubles


Yes, I've made a few more trips to The Scrap Exchange in the last month or so.  What else can I do when their Facebook status taunts me with mysterious new treasures?  

I know that some of the things I bought may seem silly, but they jumped into my basket.  Things at Scrap Exchange seem to do that.  

I don't sew a lot so I don't have a lot of fabric scraps, especially the smaller printed, quilting like fabric.  I can get a handful of little scraps, all different, for under $1.  

Buy puzzle pieces?  Yep.  I don't have a puzzle & don't really want to run out & buy a whole box when I only need a few pieces.


I also bought a few laminate samples, empty tins & lunch tickets.  I dunno what I'm going to do with everything, but I'll have fun experimenting.  I also happened upon a Speedball lino cutter handle & a brand new Speedball carving block.  I just have to get the little nibs then I can carve my own rubber stamps for my art journal and mixed media pieces.  

The little wooden houses were .10 cents a piece so I thought I"d paint them, then attach the "chimes" from an old wind chime, similar to one that I revamped a couple of weeks go.

I don't remember where I got this wind chime, but it sounds pretty & I don't like to just get rid of things if I can "pretty" them up a bit.


The colors were a little bland to me, so I brightened them up a bit.  A little gesso to prime them, then acrylic paint.  I haven't sealed it yet.


I'm going to look around at The Dollar Tree to see if I can find a wind chime that I can take apart & use with the little wooden birdhouses I got The Scrap Exchange.


I looove the leather pieces that I was able to get for $1 a piece & have big plans for them.  Maybe a couple of journals, maybe a couple of leather cuffs. 


More leather, more fabric & I love, love, love the vintage Christmas bulbs.  I had to stop myself from snaggling all of the bulbs, but Mama said it's nice to share.

Here are a couple of ATCs that I made for an online swap using a few of the things I bought.  The theme was Valentine love (of course).

The base of the ATCs are playing cards which are the perfect ATC size.  A little fabric, paper, ribbons, sewing & here's one:


Again, I use a playing card for a base, but covered it with book pages, cheesecloth, paint and more paper.  Both of these have safely reached their destination of Wales, UK.  ATC swaps are so much fun.  I've only done it for 2 months & so far my creations have gone to Canada & Wales.  I love it!!


Look what came back to me:


How sweet are these?  I love how she told a story with those two ATCs.


I spray painted 3 of my old plastic patio chairs & had a little green paint left over.  I have intensely disliked the mailbox on the front of my house for a while, but the ones I do like are so expensive.  I sanded the mailbox, cleaned it, primed it, then sprayed several thin coats of paint.  It went from rusty & painted black (sorry, no before pics) to this.  I accented the design on the top with a little gold paint & cleaned the over spray from the address bracket before I hung it back up.  Once I started working on it, I realized that it was a really nice, thick mailbox so I'm glad I decided to paint it instead of buying another.  They don't make em like they used to.

I'm sure my mail carrier is just tickled by my "new" mailbox & I'm sure it makes his heart lighter & his step more jiggly just by looking at the happy new color.  Ok, that was dripping with sarcasm, but at least it's something a little different that the standard black or brass that he looks at all day.  I can also identify my house by the one with the apple green mailbox.

A few cards I made for Mom & Grandma for Valentine's Day.


I have a few things that I'm working on right now, but they don't seem to be cooperating with me.  I have them in time out so hopefully they'll be more cooperative when I go back to them.  Until I "see" you again, I wish you all happy days & fair weather.